Comparison of Iray, Firefly, and LuxRender: Which One to Choose for Your Needs?
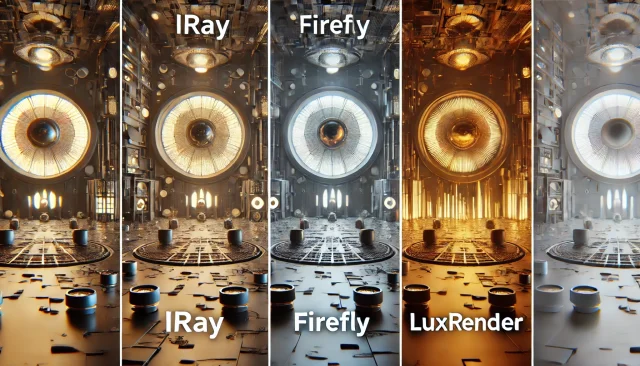
In the bustling realm of 3D art, finding the perfect rendering engine can feel like searching for hidden treasure. You want stunning realism with beautifully soft shadows and dazzling reflections, but you also need to watch the clock (and your hardware’s stress levels) so you’re not left waiting for days on end. In this guide, we’ll take a deep dive into three popular engines—Iray, Firefly, and LuxRender—to see what they bring to the table, where they shine, and how to choose which one is best for you. Buckle up and let’s get started!
Iray: GPU-Powered Realism
There’s a reason so many artists and studios have fallen in love with Iray. Developed by NVIDIA, this powerhouse engine leverages the raw computational strength of GPU technology to produce hyper-realistic visuals. If you’re craving physically accurate lighting, reflections you can lose yourself in, and next-level shadows, Iray might just be your new best friend.
Core Principles of Physically Based Rendering (PBR)
At its heart, Iray is built upon the concept of physically based rendering. This means it tries to mimic the real behavior of light as it interacts with surfaces:
- Light energy conservation: Materials in Iray are defined to ensure they don’t reflect more light than they receive.
- Complex refraction: Glass, water, and other transparent objects can bend light realistically, offering crisp caustics and prismatic color shifts.
- Accurate reflection models: Metallic surfaces, rough plastic, glossy varnish—each one gets its own characteristic highlight and reflection pattern.
Because of its physically accurate approach, Iray excels at scenes where photo-realism is the ultimate goal: think product renders, portrait shots, and architectural previews that look as if they were snapped with a high-end DSLR.
Material Setup and Common Parameters
Iray materials can be intimidating if you’re used to older or simpler engines, but the flexibility is almost boundless. Key settings to watch for include:
- Base Color (Diffuse): Dictates the fundamental tint of your material.
- Metallic and Roughness: Two principal sliders in a PBR workflow that control how “metal-like” a surface is and how sharp or diffuse its reflections appear.
- Index of Refraction (IOR): Essential for transparent or semi-transparent objects, as it determines how light bends passing through the material.
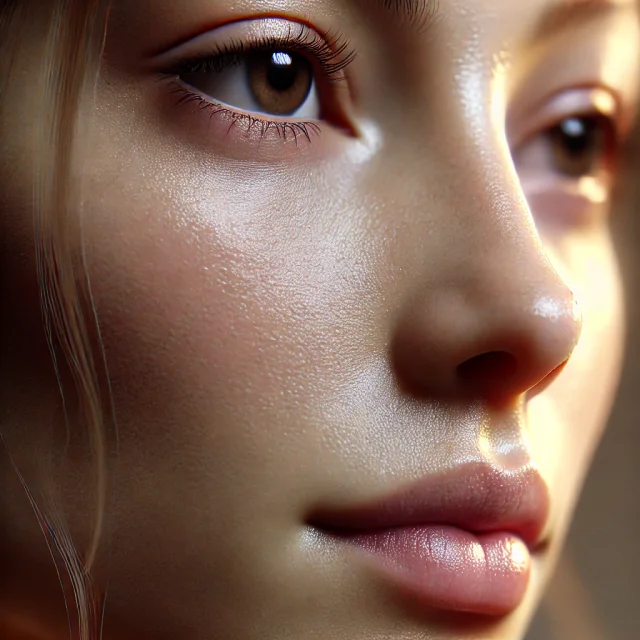
- Subsurface Scattering (SSS): Vital for realistic human skin, marble, wax, and other translucent materials.
Balancing Quality vs. Render Time
Iray is notorious for pushing your hardware to its limits. Here are a few technical tweaks to consider:
- Draw Mode: In DAZ Studio, you can switch between “Photoreal” and “Interactive” modes. “Photoreal” yields the highest-quality results, whereas “Interactive” is faster but with limited fidelity.
- Max Samples: Setting a high number of samples improves the final clarity but significantly increases render time. If you’re just previewing, dial this down.
- Denoiser: Iray’s built-in denoiser can save you hours by smoothing out the noise in fewer samples, but heavy denoising may smear fine details.
- Render Canvases: Enables you to split renders into multiple layers (e.g., beauty, depth, shadows), which is great for compositing and can occasionally speed up your workflow.
Integration with DAZ Studio
One of the biggest perks is Iray’s seamless integration with DAZ Studio. You can quickly assign Iray materials, tweak environment lighting, and set up camera parameters without juggling multiple plugins. If you want to test out new lighting setups quickly, you can download free lighting and render presets for DAZ Studio and Poser here—it’ll help you skip the tedious trial-and-error phase of building your entire lighting rig from scratch.
Firefly: The Old Guard of Poser
For years, Firefly has been the go-to engine bundled with Poser. Although it might not be the freshest face on the block, it still has a loyal following, especially among those who value versatility and a willingness to adapt to different art styles.
Why Firefly Still Matters
- CPU-Centric Approach: Firefly was developed long before GPU rendering was standard. It’s optimized to run primarily on your CPU, making it friendlier if you don’t have a powerful NVIDIA or AMD graphics card.
- Wide Range of Artistic Styles: Beyond photorealism, Firefly can handle cartoon renders, anime-style shading, and more stylized effects. If you’re creating webcomics or toons, Firefly offers a ton of flexibility.
- Established Ecosystem: Many older Poser assets were specifically tailored for Firefly’s renderer. If you’re using classic content, you won’t have to wrestle with material conversions.
Technical Tweaks in Firefly
While not as advanced as Iray or modern path tracers, Firefly offers a decent set of rendering parameters:
- Pixel Samples (X and Y): Controls the antialiasing. Larger values produce smoother edges but slow down the render.
- Min Shading Rate: A smaller shading rate gives you more detail at the cost of longer render times.
- IDL (Indirect Diffuse Lighting): Enabling IDL helps simulate indirect light bouncing around the scene, improving realism. But it can be expensive computationally.
- Raytrace Bounces: Involves how many times a ray can bounce off surfaces. More bounces = more accurate reflections/refractions, but also more waiting.
Perfect for Low-Spec Systems
Because Firefly doesn’t hinge on powerful GPUs, it’s a safe bet if you’re running on a standard CPU-based setup. You can still push Firefly to create detailed images if you’re patient. For stylized or simpler scenes, you might be pleasantly surprised by how quickly Firefly can churn out results, especially compared to advanced GPU-based renders that might bottleneck your VRAM.
LuxRender: Open-Source Fidelity
Previously known (and further developed) as LuxCoreRender, LuxRender started off as an open-source project dedicated to physically accurate light simulation. If you’re after scientific-level realism—or you simply love the ethos of open software—LuxRender stands out as a compelling choice.
Open Source and Community-Driven
- Free and Transparent: Released under the GPL, LuxRender’s code is open for anyone to inspect or modify. You’re not locked into any proprietary scheme or licensing fees.
- Active Community: Although not as large as some commercial engines, the LuxRender user base is passionate, regularly contributing plugins, bug fixes, and new features.
- Flexible Integration: While it has strong ties to Blender, you can also find community-driven bridges to other 3D software. This adaptability makes it a good fit for varied pipelines.
Physically Accurate Lighting Algorithms
LuxRender’s claim to fame is its unwavering devotion to “true-to-life” light physics:
- Path Tracing: A progressive technique that sends rays from the camera into the scene, bouncing them around to collect color and light data.
- Bidirectional Path Tracing: Approaches the problem from both the light source and the camera, particularly helpful for difficult lighting situations like caustics.
- Metropolis Light Transport (MLT): A specialized algorithm that can excel with scenes that have lots of indirect lighting or complicated reflections.
- Spectral Rendering: LuxRender handles light as actual wavelengths, which can produce natural-looking color dispersion and rainbow-like effects on refractive materials.
Advanced Settings to Know
Diving into LuxRender’s UI can be both exhilarating and overwhelming, so here’s what to look for:
- Sampling Techniques: Choose from various integrators (Path, BDPT, MLT, etc.) depending on your scene’s complexity.
- Tonemapping Options: After sampling, your image can be mapped onto a standard color range. Popular modes include “Linear,” “Reinhard,” and “Filmic,” each with different aesthetic outcomes.
- OpenCL Support: LuxRender can leverage GPUs if your device supports OpenCL. Keep in mind that certain features might still be CPU-only, so check documentation for specifics.
- Film Settings: Adjust ISO, shutter speed, or gamma curves for a more photographic approach to rendering. This is perfect for architectural or product shots where you want total control over exposure.
Performance Trade-Offs
LuxRender’s thirst for accuracy can come at the cost of speed. Even with GPU acceleration, you might find yourself needing to let the render “cook” for a while to clear out the noise. However, if you’re after images that can stand toe-to-toe with high-end commercial renders—and you have the patience or hardware—LuxRender won’t disappoint. It’s especially beloved in scientific visualization or architecture, where correctness outranks convenience.
Crucial Render Settings for Any Engine
Regardless of whether you go with Iray, Firefly, or LuxRender, you’ll want to be aware of these universal parameters:
- Samples (or Passes) – The more samples you use, the cleaner the final image. This is true in path tracers like LuxRender and in Iray. In Firefly, “Pixel Samples” or “Shading Rate” play similar roles.
- Resolution – Larger image sizes can reveal more detail but also require exponentially more render time.
- Environment Lighting – High Dynamic Range Images (HDRIs) can add depth and realism to your scene. Or you can use carefully placed mesh lights for more dramatic control.
- Shadow Quality – Higher shadow map resolutions or improved ray-traced shadows can remove jagged edges. In physically based engines, shadows are usually handled via path tracing or GI.
- Denoising – A time-saver when you’re working with progressive renders. But be wary of over-denoising, which can smear away detail.
At the end of the day, a well-balanced approach—good lighting, realistic materials, and the right sample count—can produce jaw-dropping images in any engine.
Where to Get More Content for Your Renders
Let’s face it: no matter how powerful your render engine is, you won’t get far without quality 3D assets. Experimentation is key, so you’ll need both diverse lighting setups and compelling models to see how each engine handles different complexities. On our website https://daz3dposerfree.com/ you can always download a ton of free 3d assets for Daz Studio and Poser.
- Need ready-to-go lighting? You can download free lighting for DAZ Studio and Poser here. Throw these presets into Iray, Firefly, or LuxRender to get a quick baseline for your scene’s illumination.
- Looking for character models? If you want to see how each engine tackles hair, skin shaders, and clothing folds, feel free to download new 3D character models for DAZ Studio and Poser here—all for free.
Once you’ve acquired new characters or props, try rendering the same scene in at least two engines. Compare how lights bounce, how skin tones look, and how reflective surfaces behave. That hands-on testing will tell you more than any feature list ever could.
The Bigger Picture: Choosing Your Render Engine
So, how do you pick the perfect rendering engine out of these three? The honest answer: it depends on your workflow, hardware, and ultimate goals. Here’s a quick recap:
- Iray: Ideal for photorealism if you have a capable NVIDIA GPU. Fully integrated into DAZ Studio, making it a breeze for those who live and breathe in that ecosystem. Prepare for potentially long render times if your scene is massive or your VRAM is limited.
- Firefly: The stalwart engine for Poser, it’s CPU-friendly, good for stylized or cartoon-like rendering, and can still hold its own in simpler photoreal scenes if you dial in the settings. It’s a solid choice if you don’t have a top-tier GPU or if you’re deeply entrenched in the Poser workflow.
- LuxRender: For the open-source enthusiast or anyone craving physically accurate light simulations, LuxRender (or LuxCoreRender) stands tall. Its learning curve can be steep, and it can be slow if you push for near-perfect realism. However, the freedom and community support can be well worth the investment.
Ultimately, each engine offers a distinct flavor. The best way to find your favorite is to experiment. Fire up Iray for a test scene, time it, tweak it, then do the same with Firefly and LuxRender. Keep track of your own impressions about workflow ease, image fidelity, and render speed. Before long, you’ll discover which engine suits your artistry and hardware setup like a glove.
No matter your choice, remember that top-tier rendering is equal parts science and artistry. You control the lights, the materials, and the composition—no engine can replace an artist’s vision and creativity. Dive in, play with those settings, and let your imagination roam free. Your perfect render is just a few tweaks (and maybe a bit of coffee-fueled patience) away.
Ctrl
Enter
Noticed a misTake
Highlight text and press Ctrl+EnterRelated news:
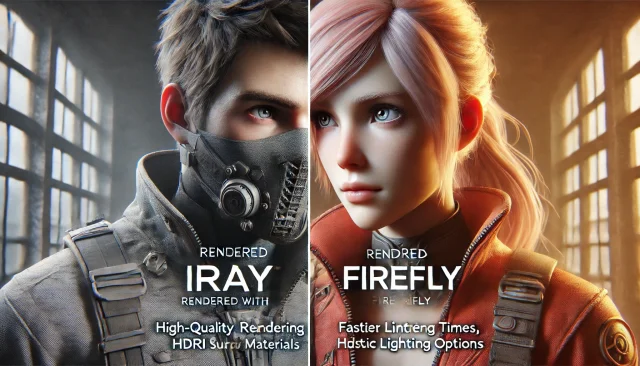
Using Iray and Firefly for Rendering in DAZ Studio and Poser
Using third-party plug-ins to create complex special effects in DAZ Studio and Poser

Creating and Adjusting Lighting for Atmospheric 3D Scenes in DAZ Studio and Poser
Creating Motion Animations: An In-depth Guide to Producing Smooth and Lifelike Movements in DAZ Studio
Cinematic Rendering Techniques in DAZ Studio: How to Set Up Framing and Post-Processing Scenes
Secrets of Photorealistic Skin Rendering in DAZ Studio and Poser: Achieving the "Lifelike Skin" Effect with Modern Shaders
Comments (0)