Secrets of Photorealistic Skin Rendering in DAZ Studio and Poser: Achieving the "Lifelike Skin" Effect with Modern Shaders
Creating photorealistic characters is a dream for every 3D artist working in DAZ Studio and Poser. One of the most challenging aspects of this process is rendering realistic skin. Skin is something we see every day, and the human eye is naturally drawn to imperfections or unnatural elements. If the skin looks "off," it breaks the illusion, and even the most detailed 3D character can feel lifeless. In this guide, I will share secrets on how to use shaders and modern rendering techniques to achieve the coveted “lifelike skin” effect, giving your characters a truly realistic look.
Why Rendering Realistic Skin Is So Challenging
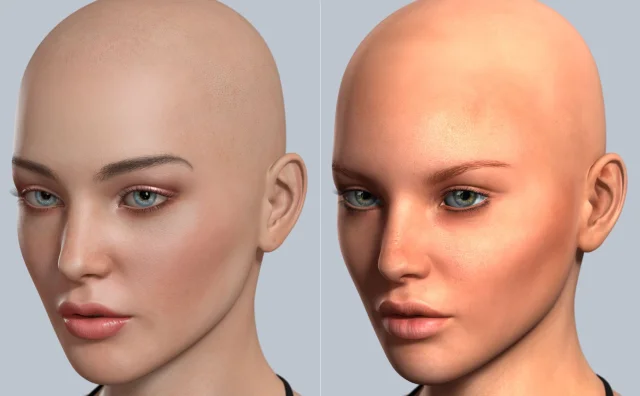
Skin isn't just a simple surface like metal or plastic; it consists of several layers, each reacting to light in different ways. The outer layer, the epidermis, reflects light, while deeper layers (dermis and hypodermis) absorb and scatter the light. This phenomenon is called subsurface scattering (SSS), and it’s essential for making skin appear alive and organic.
Achieving photorealism requires understanding how these layers interact. Even the most meticulously sculpted model will look flat and fake without proper shading and lighting.
Subsurface Scattering: The Key to "Lifelike" Skin
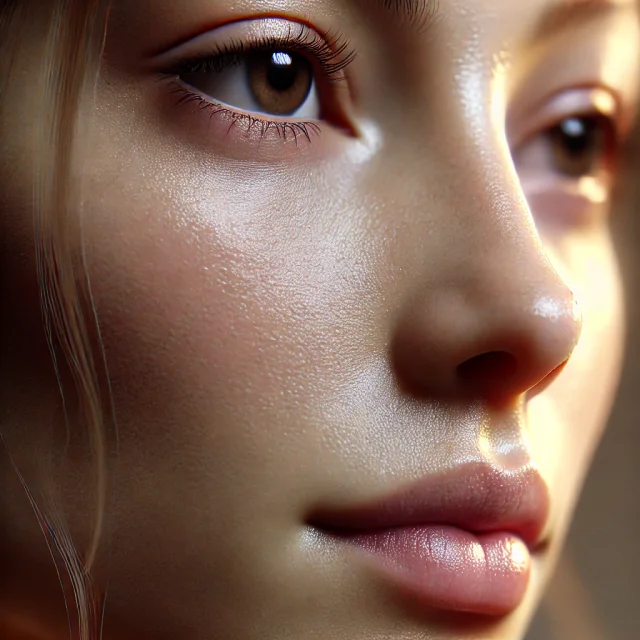
Subsurface scattering (SSS) is the magic behind realistic skin rendering. When light hits the skin, it doesn't just bounce off the surface. Instead, it penetrates slightly, scatters through the tissue, and then exits, creating that soft, glowing effect that we recognize as natural skin. This subtle diffusion of light gives the skin its softness and complexity.
DAZ Studio’s Iray and Poser’s Firefly render engines both support subsurface scattering, but adjusting it correctly is the key to unlocking realistic results. Many modern skin shaders already include SSS settings, but fine-tuning these values can significantly enhance realism.
- Scattering scale: This controls how deep the light penetrates beneath the skin's surface. For thinner skin, like the ears or nose, you'll want a higher scattering value.
- Scattering color: This determines the color of the scattered light. Human skin typically scatters warm tones—pink, red, and orange—because of the blood vessels beneath the surface. Fine-tuning this color will add warmth and naturalism to your character.
Fine-Tuning Skin Shaders in DAZ Studio and Poser
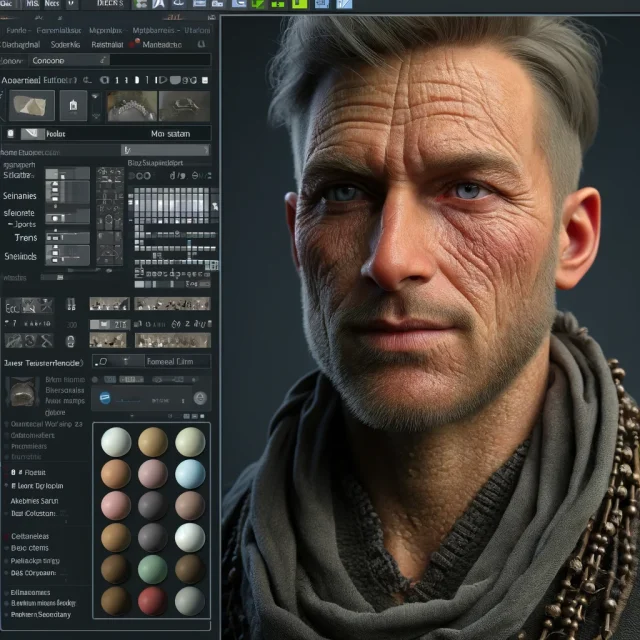
Both DAZ Studio and Poser offer powerful tools for creating realistic skin using shaders. For instance, DAZ Studio’s Iray Uber Base shader gives you extensive control over how light interacts with skin, making it one of the most versatile tools for skin rendering.
- Normal Map: This map is critical for adding surface details such as pores and fine wrinkles without increasing the poly count of your model. Using a high-quality normal map makes the skin appear more detailed and textured, contributing to the overall sense of realism.
- Glossiness and Specularity: Skin isn’t entirely matte; it has subtle reflective qualities, especially in oily or moist areas like the forehead or nose. Properly adjusting glossiness gives the skin that fresh, youthful look without making it appear plastic.
- Specular Map: The specular map determines which areas of the skin reflect more light. For example, the forehead and nose typically reflect more light than the cheeks or jawline. A well-adjusted specular map can add dynamic depth to your skin material.
- Micro Surface Detail: Certain shaders, such as Iray’s Uber Base, offer micro surface detail options to simulate the fine texture of human skin. High-resolution maps create intricate surface textures, mimicking pores, fine lines, and other skin imperfections.
The Importance of High-Resolution Textures
While shaders play a crucial role, high-quality textures are the foundation of photorealistic skin. Using high-resolution textures ensures that your skin looks rich with details like pores, freckles, and subtle pigmentation differences, which bring out the complexity of human skin.
You’ll need a combination of diffuse maps, normal maps, and subsurface maps to create realistic skin effects:
- Diffuse Map: This is the base texture that defines the color of the skin. It should be detailed enough to show subtle variations in skin tone, freckles, blemishes, and other imperfections that make the skin look alive.
- Normal Map: As mentioned earlier, normal maps simulate surface detail, such as pores and wrinkles. Without a good normal map, the skin will appear unnaturally smooth, which breaks the illusion of realism.
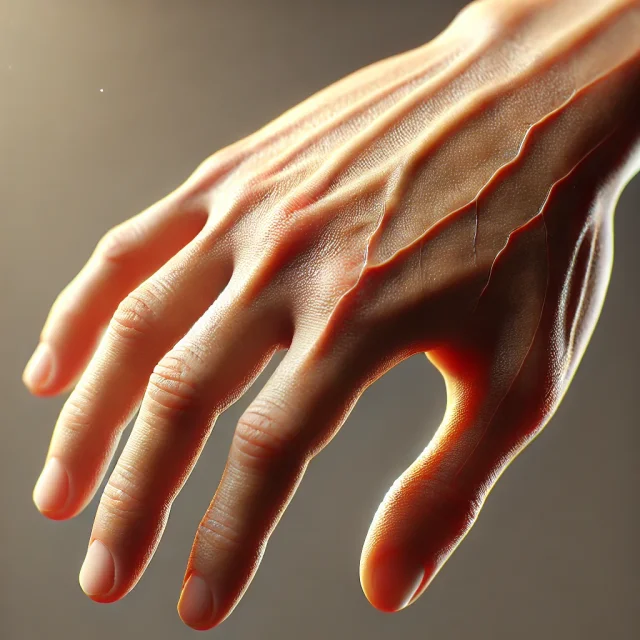
- Subsurface Map: This map controls how the light penetrates the skin. Areas like the ears or the tip of the nose will scatter more light and appear slightly translucent, while thicker areas like the forehead will scatter less.
Lighting: Your Ally in Realism
No matter how good your textures and shaders are, lighting can make or break the final render. Lighting is crucial to creating the illusion of realism in skin rendering. Soft lighting is particularly effective in simulating natural skin by reducing harsh shadows and subtly highlighting details.
- Soft Light Sources: Use multiple soft light sources to illuminate the character from different angles. One key light can mimic the sun or studio light, while additional fill lights can help soften shadows and balance the scene.
- HDRI Environment Maps: High-quality HDRI maps create natural reflections and soft shadows, giving depth to your renders. These are especially useful for rendering portraits or close-ups, where skin details are critical.
Optimizing Render Engines: Iray vs Firefly
Both DAZ Studio’s Iray and Poser’s Firefly render engines have unique strengths and weaknesses when it comes to photorealistic rendering. Both can handle complex shaders and subsurface scattering, but knowing their quirks can help you push your renders further.
- Iray: Iray is a physically based render engine (PBR) and excels at creating realistic light interactions, making it an excellent choice for skin rendering. It accurately simulates how light reflects, refracts, and scatters on human skin. However, because it uses ray tracing, it’s resource-intensive and demands a powerful GPU for fast renders.
- Firefly: While Firefly is older and less advanced, it can still deliver great results with the right settings. It handles stylized renders well and is more forgiving on system resources, making it a good option for less demanding scenes. When properly configured, it can simulate realistic skin, though it requires more manual tweaking compared to Iray.
Advanced Skin Techniques: Going Beyond Basics
While we’ve covered the foundational aspects, there are more advanced techniques for pushing realism even further:
- Displacement Maps: Displacement maps can be used to simulate larger skin details like veins, scars, and deep wrinkles by physically altering the surface geometry of the model. This adds an extra layer of depth that normal maps can’t achieve.
- Layered Shaders: Some artists create multi-layered shaders to better simulate the complexity of human skin, combining different materials for the epidermis, dermis, and subdermal layers. This approach allows for even more control over how light interacts with the skin.
- Microfacet BRDF Models: These advanced shading models simulate how light reflects off tiny facets on the skin’s surface, producing more nuanced and realistic highlights.
Post-Processing for Realism
After you’ve rendered your image, there’s still more you can do to enhance realism through post-processing. This stage is where you can add final touches that make the skin pop and feel more lifelike.
- Subtle Bloom: Adding a slight bloom effect can make the highlights on the skin appear more natural, especially around bright areas like the forehead or the cheeks.
- Color Grading: Color grading can help unify the overall tone of your scene, adding warmth to the skin or adjusting hues to match your lighting conditions better.
- Fine Contrast Adjustments: Small tweaks to contrast and sharpness can help bring out the finest details in your skin textures and emphasize the depth created by your shaders.
Conclusion: Achieving Photorealism Is a Journey
Creating photorealistic skin is both an art and a science. It requires a deep understanding of light, textures, shaders, and how they interact. Every detail, from the roughness of the skin to the way light scatters beneath the surface, plays a role in achieving realism.
In DAZ Studio and Poser, the tools are at your fingertips. By mastering subsurface scattering, using high-quality textures, optimizing your render engine settings, and paying close attention to lighting, you can bring your 3D characters to life in ways that captivate viewers and blur the line between the virtual
Don't forget to visit our section with ready-made characters for DAZ Studio / Poser - there you can download hundreds of 3D men, women, beautiful girls, children of all races and nationalities for free. We also have a ready category with textures and materials - there you can get dozens of useful files with the right PBR images for your projects. And of course check out this link - there you will definitely find useful content for lighting and rendering your scenes. Our site offers constant updates of content for DAZ and Poser - don't forget to add it to your bookmarks!
Ctrl
Enter
Noticed a misTake
Highlight text and press Ctrl+EnterRelated news:
Advanced Texturing Techniques in DAZ Studio and Poser

Creating and Adjusting Lighting for Atmospheric 3D Scenes in DAZ Studio and Poser

Creating Photorealistic Portraits in DAZ Studio and Poser
Analyzing Trends in Creating 3D Characters for Films and Video Games
Working with 3D Scans in DAZ Studio and Poser: A Detailed Guide to Importing and Using Real-World Scans
Creating Motion and Emotion Animations for 3D Characters in DAZ Studio and Poser
Comments (1)