Integration of DAZ Studio and Poser with Other 3D Packages: Discussion of Import and Export Processes and Techniques
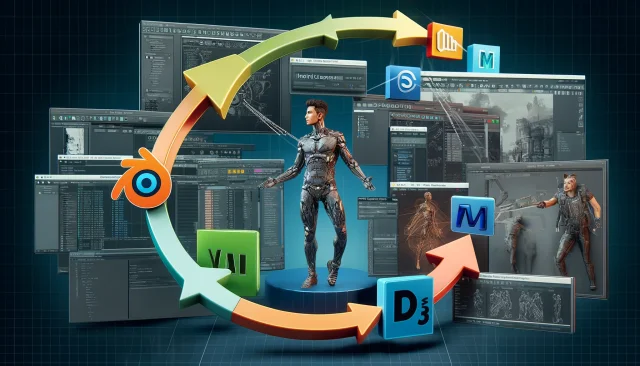
DAZ Studio and Poser are powerful tools for creating and animating 3D characters. However, there is often a need to integrate these tools with other popular 3D packages, such as Maya, Blender, and 3ds Max. In this article, we will explore the processes and techniques for importing and exporting between DAZ Studio/Poser and these programs. We will delve into the tools and settings used to ensure maximum accuracy and quality when transferring data.
Importing and Exporting between DAZ Studio and Other 3D Packages
Preparing the Model in DAZ Studio
Before exporting, it is crucial to ensure that the model is ready for transfer to another 3D package. In DAZ Studio, it is important to set up the correct parameters for textures, poses, and animations.
- Texture Setup: Ensure that all textures are correctly applied and have the appropriate resolution. It is best to use formats supported by most 3D packages, such as PNG or JPEG.
- Rigging and Animation: If the model has a skeleton and animations, make sure all elements are animated correctly. Exporting animations requires additional preparation, including setting keyframes and verifying the proper functioning of IK (Inverse Kinematics).
- Model Optimization: Ensure that the model does not contain unnecessary polygons, as this can cause issues when importing into other programs.
Exporting from DAZ Studio
DAZ Studio supports several export formats, the most popular of which are:
- FBX (Filmbox): One of the most popular formats for exchanging data between 3D packages. Supports models, textures, animations, and rigging.
- OBJ (Wavefront Object): A format used to transfer geometry and textures. Suitable for cases where animation or rigging transfer is not required.
- DAE (Collada): A format that supports data exchange between various 3D packages. Suitable for transferring scenes with textures and animations.
Importing into Other 3D Packages
Blender
Blender is a free and powerful 3D editor with extensive capabilities.
- Importing FBX: Blender supports importing FBX files through a standard add-on. Open Blender, go to File > Import > FBX, and select the file exported from DAZ Studio. Ensure that all textures and animations are loaded correctly.
- Importing OBJ: To import OBJ files into Blender, go to File > Import > Wavefront (.obj) and select the file. Ensure that materials and textures are loaded correctly.
- Material Setup: After importing, you may need to set up materials, as Blender uses its own shader system. Go to the Shading tab and ensure that all materials are set up correctly.
Maya
Maya is a powerful 3D editor widely used in the film and game industries.
- Importing FBX: Maya supports importing FBX files directly. Go to File > Import and select the FBX file. Check the import settings to ensure that textures and animations are loaded correctly.
- Importing OBJ: For importing OBJ files, open the File > Import menu and select the OBJ file. After importing, manual material setup may be required.
- Material Setup: Maya uses a material system different from DAZ Studio. Ensure that all textures and shaders are set up correctly to maintain the original look of the model.
3ds Max
3ds Max is a popular 3D editor used in architectural visualization and game development.
- Importing FBX: To import FBX files into 3ds Max, go to File > Import > Import and select the FBX file. Check the import settings to ensure that textures and animations are loaded correctly.
- Importing OBJ: For importing OBJ files, go to File > Import > Import and select the OBJ file. Check the material and texture settings after importing.
- Material Setup: In 3ds Max, you may need to set up materials and shaders. Use the material editor to ensure that all textures are applied correctly.
Issues and Solutions
Texture Mismatch
When importing models, textures may sometimes display incorrectly. This can be due to differences in texture coordinate systems and material formats. Ensure that all textures are exported in supported formats and that UV coordinates are correctly mapped.
Animation Issues
When transferring animations, problems with keyframes and rigging may arise. This can be due to differences in animation systems between programs. Check the correctness of the animation after importing and adjust keyframes if necessary.
Shader Compatibility
Different 3D packages use their own shader and material systems. After importing the model, material and shader setup may be required to maintain the original look of the model. Use the material editors in the respective programs to adjust shaders and textures.
Importing and Exporting between Poser and Other 3D Packages
Preparing the Model in Poser
Before exporting a model from Poser, ensure that it is ready for transfer to another 3D package. Proper setup of textures, poses, and animations is crucial.
- Texture Setup: Check that all textures are correctly applied and have the appropriate resolution. It is best to use PNG or JPEG formats.
- Rigging and Animation: Ensure that the model is correctly animated. Exporting animations requires setting keyframes and verifying IK functionality.
- Model Optimization: Ensure that the model does not contain unnecessary polygons.
Exporting from Poser
Poser supports several export formats:
- FBX: A format for transferring models, textures, animations, and rigging.
- OBJ: A format for transferring geometry and textures.
- Collada (DAE): A format for exchanging data between various 3D packages.
Importing into Other 3D Packages
Blender
- Importing FBX: Blender supports importing FBX files through an add-on. Go to File > Import > FBX and select the file.
- Importing OBJ: Go to File > Import > Wavefront (.obj) and select the file.
- Material Setup: After importing, set up materials in the Shading section.
Maya
- Importing FBX: Go to File > Import and select the FBX file.
- Importing OBJ: Go to File > Import and select the OBJ file.
- Material Setup: Ensure that all textures and shaders are correctly set up.
3ds Max
- Importing FBX: Go to File > Import > Import and select the FBX file.
- Importing OBJ: Go to File > Import > Import and select the OBJ file.
- Material Setup: Set up materials in the material editor.
Issues and Solutions
Texture Mismatch
Texture issues may arise due to differences in texture coordinate systems. Ensure that textures are exported in supported formats and that UV coordinates are correctly mapped.
Animation Issues
Animation transfer issues may arise with keyframes and rigging. Check the correctness of the animation after importing and adjust keyframes if necessary.
Shader Compatibility
After importing the model, material and shader setup may be required to maintain the original look. Use material editors to adjust shaders and textures.
Conclusion
Integrating DAZ Studio and Poser with other popular 3D packages such as Maya, Blender, and 3ds Max requires attention to detail and proper export and import parameter setup. Using the right formats, setting up textures, rigging, and animations, and adjusting materials after importing will help maintain the quality and accuracy of models when transferring data between different programs. To simplify this process, you can download ready-made characters for DAZ Studio and Poser for free from the section of our website here.
Ctrl
Enter
Noticed a misTake
Highlight text and press Ctrl+EnterRelated news:

Top Character Animation Tools in 2024
Advanced Texturing Techniques in DAZ Studio and Poser
Working with 3D Scans in DAZ Studio and Poser: A Detailed Guide to Importing and Using Real-World Scans
Creating Motion and Emotion Animations for 3D Characters in DAZ Studio and Poser
Analyzing Trends in Creating 3D Characters for Films and Video Games

Creating Photorealistic Portraits in DAZ Studio and Poser
Comments (0)