Using 3D scans of people and objects in Poser: How to adapt data to work in scenes

Imagine capturing every tiny fold, pore, and nuance of a real person or object and bringing it into the digital world with such precision that it becomes nearly indistinguishable from reality. This is the magic of 3D scanning — an artful blend of technology and creativity that allows us to recreate life-like models for use in software like Poser. With 3D scans, artists can craft incredibly realistic scenes, but integrating these scans isn’t as simple as dropping them into a scene. To make these high-resolution models usable and visually cohesive, they require a meticulous process of adaptation and optimization. Let’s delve into the methods, tools, and techniques for harnessing the power of 3D scans in Poser.
How 3D Scans Are Created and What Makes Them Unique
The process of creating a 3D scan begins with capturing the surface geometry and textures of an object or person. Specialized 3D scanners or photogrammetry techniques take countless measurements to compile a digital replica rich in detail and fidelity. The result is a high-poly, complex mesh with texture maps that recreate the object’s real-world appearance.
These scans are dense with data — often containing millions of polygons and ultra-detailed textures. This complexity gives them the potential to achieve hyper-realistic results, but it also makes them resource-intensive. To maintain Poser’s performance while preserving realism, it’s crucial to optimize these models.
Preparing 3D Scans for Use in Poser
To fully leverage a 3D scan in Poser, we need to reduce its resource demands while retaining visual quality. This preparation process involves multiple steps, from mesh editing and polygon reduction to texture optimization and adjustments.
Mesh Simplification for Improved Performance
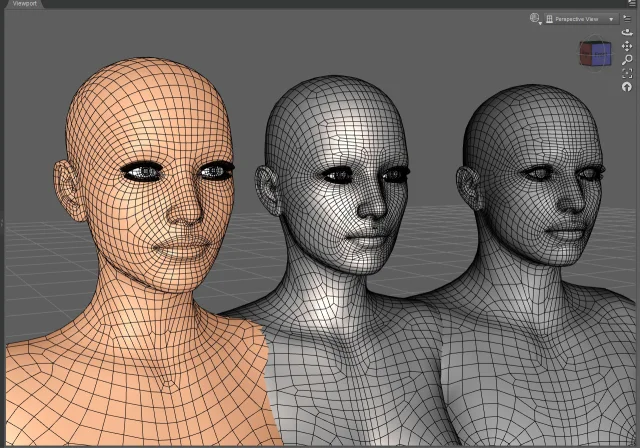
Most 3D scans come with dense, high-polygon meshes that are too detailed for efficient rendering in Poser. The goal of mesh simplification is to retain the key structural details of the scan while reducing its polygon count. This step can be performed using decimation tools either within Poser or in external software, like Blender or ZBrush.
- Use decimation to simplify the mesh while preserving important features.
- Apply selective reduction, keeping high detail in facial or critical areas while reducing polygons in less noticeable parts.
- Consider retopology if the scan will be animated, as it creates a cleaner, more manageable mesh for rigging.
Optimizing Textures for Realism and Efficiency
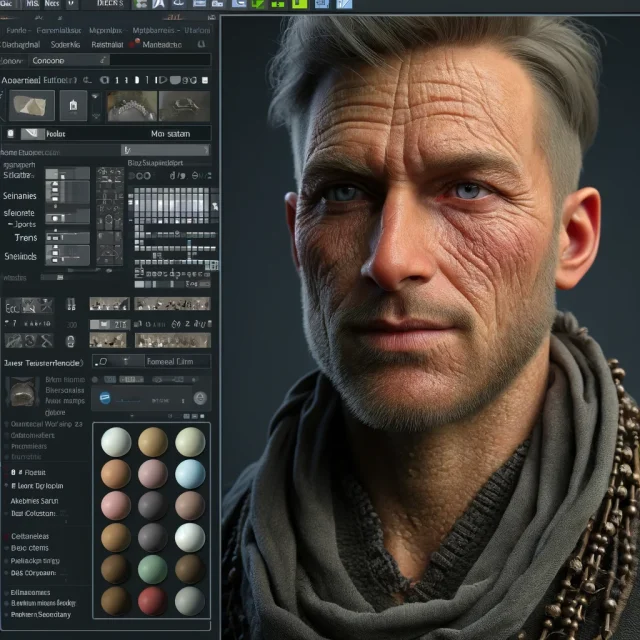
The visual impact of 3D scans is heavily reliant on high-resolution textures, which include normal, bump, and displacement maps. When integrating a scan into Poser, balancing texture resolution is essential. Excessively high resolutions can lead to sluggish performance, while lower resolutions may lose critical details.
- For high-quality results, convert the original diffuse map into a lower-resolution base with added detail from normal and displacement maps.
- Use 4K textures for facial details and reduce to 2K or 1K for other areas, depending on the prominence of those parts in the scene.
- Utilize Poser’s material editor to fine-tune the texture settings for brightness, contrast, and other parameters to achieve the desired realism.
Rigging and Animating 3D Scans in Poser
One of the primary challenges in using 3D scans for characters is the ability to animate them. A scan is typically a static model, but with Poser’s tools, you can add a skeleton and rigging, making it possible to animate body parts, poses, and even expressions.
Setting Up the Skeleton and Rigging for Animation
Rigging a scanned model involves adding a digital skeleton to the mesh, allowing it to move naturally. Here’s a step-by-step approach:
- Use Poser’s auto-rigging tools to start with a basic skeleton, then manually adjust bones to fit the scan’s structure.
- Fine-tune the bone weights in critical areas, such as joints, to avoid unwanted mesh stretching during animation.
- For more advanced results, consider using weight painting to customize how different bones affect specific parts of the mesh.
Animating Expressions and Movements for Realism
With the skeleton in place, you can start creating animations. For realistic characters, facial expressions add life to the model, transforming a static scan into a living digital entity.
- Use morph targets or blend shapes in Poser to create facial expressions.
- Apply keyframe animation to individual bones for complex movements, or use Poser’s preset animations as a base.
- Combine with lip-sync tools if the character is intended for dialogue scenes, adding depth to the portrayal.
Practical Tips and Tricks for Working with 3D Scans in Poser
Once you’ve set up your 3D scan, enhancing its realism and efficiency in Poser becomes a matter of detailed adjustments. Here are some essential techniques to make your scanned models look even more lifelike:
- **Lighting**: Use Poser’s lighting system to cast soft shadows and highlights, accentuating the model’s details. Avoid overly harsh lights, as they can obscure delicate textures.
- **Material Settings**: Tweak reflectivity, glossiness, and transparency in the material editor. Subsurface scattering (SSS) can be especially helpful for skin, giving it a natural, translucent quality.
- **Depth of Field (DoF)**: Apply DoF in Poser’s camera settings to emphasize your subject and blur the background, creating a photo-realistic effect.
Advanced Customization: Adding Custom Shaders and Effects
One way to enhance the look of your 3D scan in Poser is by using shaders that mimic real-world materials. For example, skin shaders add subsurface scattering, while metallic shaders can enhance objects like jewelry or metallic accessories on characters.
Applying Skin Shaders for Realistic Characters
Skin shaders are critical in achieving realism for character models. They replicate how light penetrates the skin and scatters, creating a soft glow.
- Use Poser’s SSS settings to give skin a lifelike translucency.
- Experiment with bump and specular maps to replicate fine skin details and realistic shine.
- Adjust color and tone using Poser’s HSV controls to match the original scan’s appearance.
Integrating Props and Backgrounds for Complete Scenes
Adding appropriate props or backgrounds helps the 3D scan feel part of a cohesive scene. To seamlessly integrate these elements:
- Use props with a consistent texture style to avoid visual disconnect between the scan and other elements.
- Apply lighting to match the overall tone of the scene, using soft shadows and reflections where necessary.
- Experiment with HDRI backgrounds in Poser to create a realistic environment and reflections.
Conclusion: Taking Realism to the Next Level with 3D Scans
Using 3D scans in Poser transforms digital art by bridging the gap between virtual and physical reality. With careful optimization and smart techniques, artists can create scenes that feel almost tangible. The combination of scanning technology with Poser’s rendering tools allows for detailed, emotionally engaging artworks that would otherwise be difficult to achieve.
For those ready to dive deeper into realistic 3D scenes, explore our section of free 3D assets of male and female characters for DAZ Studio and Poser to start your journey. These assets offer a foundation for creating intricate, life-like digital scenes and characters, giving you a toolkit to bring your creative visions to life.
Ctrl
Enter
Noticed a misTake
Highlight text and press Ctrl+EnterRelated news:

Analyzing Trends in Creating 3D Characters for Films and Video Games

Working with 3D Scans in DAZ Studio and Poser: A Detailed Guide to Importing and Using Real-World Scans

Top Character Animation Tools in 2024

Optimizing 3D Models for Real-Time Rendering

Advanced Texturing Techniques in DAZ Studio and Poser

Creating Characters for VR and AR Projects Using DAZ Studio and Poser: Practical Optimization Tips
Comments (0)
