Creating Dynamic Clothing for 3D Characters

Creating dynamic clothing for 3D characters is a complex but rewarding process that allows you to achieve realistic movements and interactions between the clothing and the character's body. This comprehensive guide will walk you through the steps of creating and simulating dynamic clothing in DAZ Studio and Poser, equipping you with the necessary techniques, tools, and settings to master this art.
Understanding Dynamic Clothing
Dynamic clothing differs from static clothing in that it can move and interact with the character's body and environment. This is achieved through the use of special simulation algorithms that take into account the physical properties of fabric, such as weight, flexibility, and friction. Unlike static clothing, which is simply "worn" by the model, dynamic clothing provides a more realistic and lifelike appearance.
Step 1: Creating the Base Model of the Clothing
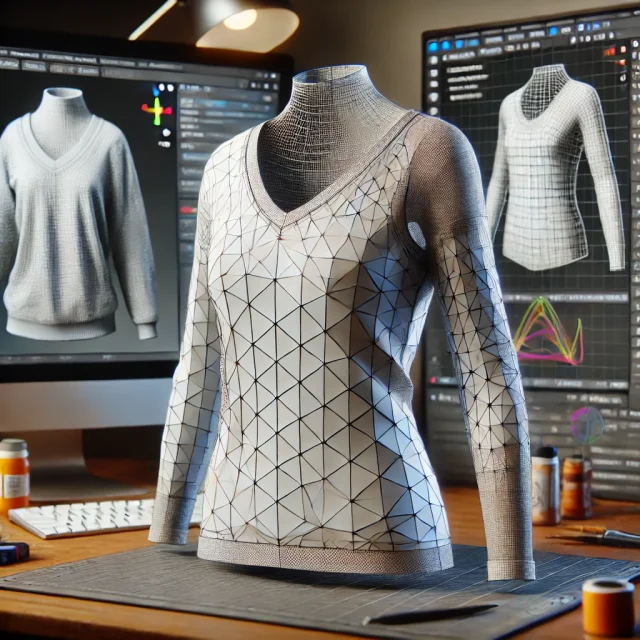
The first step in creating dynamic clothing is modeling the basic shape of the garment. This can be done using any 3D modeling software, such as Blender, 3ds Max, or Maya. Here are some key considerations:
- Topology: Pay attention to the topology of the model. The more polygons it has, the more detailed the simulation will be. However, too many polygons can significantly slow down the simulation process.
- Seams and Details: Consider where the seams and other details of the clothing will be placed. This will help you better control the simulation process and achieve a more realistic result.
Step 2: Exporting the Model to DAZ Studio or Poser
Once you have created the base model, it needs to be exported to DAZ Studio or Poser. The OBJ format is commonly used for this purpose, as it supports the transfer of geometry without loss. Ensure that all sizes and proportions are correctly transferred during the export process.
Step 3: Setting Up Physical Simulation in DAZ Studio
In DAZ Studio, the dForce module is used for simulating dynamic clothing. Here’s a step-by-step guide to setting up dForce:
1. Import the Model: Import your clothing model into the DAZ Studio scene and position it on the character.
2. Apply the dForce Modifier: Select the clothing model and go to the 'Simulation Settings' section. Add the dForce Modifier Dynamic Surface.
3. Configure Simulation Parameters: In this section, you can adjust simulation parameters such as density, elasticity, and friction. Experiment with different settings to achieve the best result.
4. Run the Simulation: After configuring the parameters, click 'Simulate' to start the simulation process. Observe how the fabric interacts with the character's body and other objects in the scene.
Step 4: Setting Up Physical Simulation in Poser
Poser uses the Cloth Room for simulating dynamic clothing. Here’s a step-by-step guide to using this module:
1. Import the Model: Import your clothing model into the Poser scene and position it on the character.
2. Set Up the Clothing as a Cloth Object: Go to the Cloth Room and add the clothing model as a new Cloth object. This allows Poser to recognize it as dynamic fabric.
3. Create a Cloth Simulation: Create a new simulation and configure fabric parameters such as weight, density, and friction. Experimenting with these parameters is essential to find the optimal values for your model.
4. Run the Simulation: Click 'Calculate Simulation' to start the process. Monitor how the fabric interacts with the character's body and make necessary adjustments to the parameters.
Step 5: Testing and Optimization
After completing the initial simulation, it's important to test and optimize the model. Pay attention to the following points:
- Collision Checking: Ensure that the fabric does not pass through the character's body or other objects in the scene. If this happens, try adjusting the collision parameters or adding additional collision objects.
- Parameter Adjustment: If the simulation results are not satisfactory, go back to the parameter settings and experiment to achieve a more realistic behavior of the fabric.
- Animation and Final Touches: Once you are satisfied with the results, proceed to animate the character and finalize the scene. Make sure the clothing reacts correctly to all movements and interactions.
Advanced Techniques for Dynamic Clothing Simulation
As you become more familiar with dynamic clothing simulation, you may want to explore advanced techniques to further enhance the realism of your models. Here are some advanced tips:
- Using Multiple Layers: Simulate multiple layers of clothing, such as an outer coat over a shirt. This adds complexity and realism to the interactions between different fabrics.
- Custom Collision Objects: Create custom collision objects to better control how the fabric interacts with the character and other elements in the scene.
- Detailed Fabric Properties: Experiment with detailed fabric properties such as stretch, shear, and bend stiffness to fine-tune the behavior of the clothing.
- Wind and Other Environmental Effects: Add wind and other environmental effects to your simulation for a more dynamic and realistic scene.
In Conclusion
Creating dynamic clothing for 3D characters is a time-consuming process, but the results are worth it. A well-set simulation allows for a high degree of realism, making your models more lifelike and believable. It's essential to experiment with parameters and continuously improve your skills.
For those looking to speed up the process of creating dynamic clothing or seeking high-quality models for their projects, we offer a section on our website where you can download free ready-made 3D clothing and textures for DAZ Studio and Poser. Visit this link to explore our resources and add uniqueness to your projects.
Ctrl
Enter
Noticed a misTake
Highlight text and press Ctrl+EnterRelated news:
Advanced Texturing Techniques in DAZ Studio and Poser
Analyzing Trends in Creating 3D Characters for Films and Video Games

Virtual Reality and 3D Characters: Exploring the Possibilities of Creating 3D Characters for VR Projects with DAZ Studio and Poser, and Necessary Adaptations for VR

Hair Setup and Rendering in DAZ Studio and Poser
Comprehensive Guide to Creating Realistic 3D Characters
Creating Photorealistic Portraits in DAZ Studio and Poser
Comments (0)
