Creating Environments in DAZ Studio: How to Use HDRI and 3D Models to Build Atmospheric Scenes
Creating a realistic and captivating environment is the key to immersing your audience into your story. In DAZ Studio, two powerful tools help to bring this environment to life: HDRI (High Dynamic Range Imaging) maps and 3D models. When combined, these tools can create highly detailed and atmospheric scenes that evoke emotions and elevate your projects to a professional level. In this guide, we'll explore how to effectively use HDRI for realistic lighting and 3D models to add depth and richness to your scenes.
What is HDRI and Why is It Essential for Scene Creation?
HDRI is a method used to capture images with a wide range of lighting, from the darkest shadows to the brightest highlights. In DAZ Studio, HDRI maps act as an environmental lighting source that wraps your entire scene in light, providing natural reflections and ambient lighting without the need for multiple artificial light sources.
Choosing the right HDRI can dramatically affect the mood of your scene. Whether you're aiming for a soft morning glow, a dramatic sunset, or a cold, foggy atmosphere, there's an HDRI map that can enhance the lighting and bring your scene to life. Using HDRI reduces the need for complex lighting setups, making it an invaluable tool for both beginners and advanced artists.
Advantages of Using HDRI in DAZ Studio:
- Natural, realistic lighting with minimal setup.
- High-quality reflections and shadows for photorealism.
- Wide variety of HDRI maps available for different moods and scenes.
- HDRI can simulate both indoor and outdoor environments, enhancing versatility.
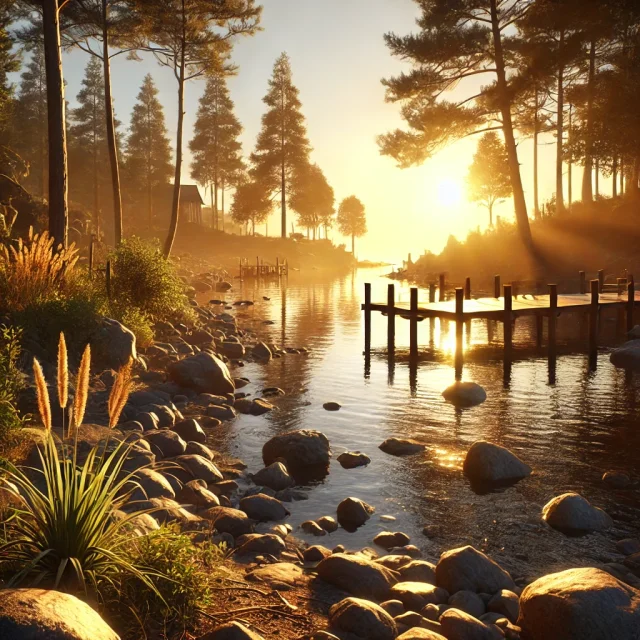
Imagine setting up a scene where your 3D character is bathed in the warm glow of a sunset, with long shadows and soft, diffused light bouncing off nearby surfaces. With HDRI, achieving this kind of atmospheric lighting becomes seamless.
Building Detailed Environments with 3D Models
While HDRI provides the lighting foundation, it's the 3D models that give your scene structure, depth, and richness. The key to creating a truly immersive environment lies in the thoughtful placement and selection of these models. You can populate your scene with a wide range of objects — from architectural elements to natural landscapes, each adding a layer of complexity.
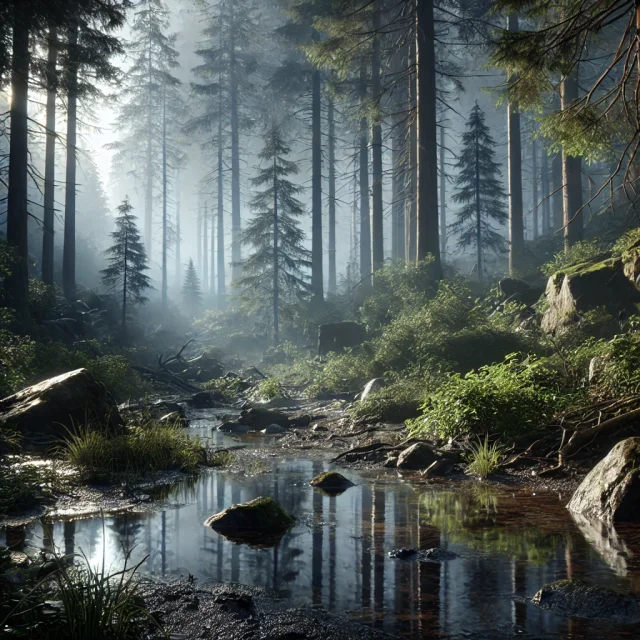
For instance, a forest scene can become more alive with the addition of trees, underbrush, rocks, and perhaps even small animals. The more detail you add, the more immersive and believable your environment becomes. But remember, balance is key. Too much detail can overwhelm the viewer, so strategically place your objects to draw the eye where you want it to go.
Tips for Using 3D Models in Scene Creation:
- Select models that align with the overall theme and mood of your project.
- Use varying scales and distances to create depth in the scene.
- Be mindful of how models interact with the HDRI lighting; reflections and shadows should match the environment.
- Don’t clutter the scene with unnecessary objects – focus on the elements that enhance storytelling.
- Experiment with foreground, midground, and background elements to create a sense of space and dimension.
When constructing a 3D environment, it’s essential to plan the scene like a director setting up a film shot. Each model should serve a purpose, guiding the viewer’s eye and enhancing the overall narrative of the project.
Combining HDRI and 3D Models: The Path to Photorealism
The real magic happens when HDRI lighting and 3D models are combined. HDRI creates natural, ambient lighting, while 3D models provide the physical detail necessary to make the scene come alive. When done correctly, this combination leads to a photorealistic scene that draws viewers in and leaves a lasting impression.
For example, imagine you’re creating a beach scene. Start with an HDRI map that simulates a sunny day with bright reflections off the water and soft, golden light illuminating the sand. Then, place 3D models of palm trees, rocks, and perhaps a wooden pier. The interaction between the objects and the light—how the trees cast shadows, how the sunlight reflects off the water—creates a sense of place and atmosphere that’s incredibly powerful.
Key Considerations When Merging HDRI and 3D Models:
- Ensure that the lighting direction of your HDRI matches the placement of your 3D objects for realistic shadows and highlights.
- Use reflective materials on surfaces like water or glass to fully capitalize on the HDRI lighting.
- Play with depth of field to focus the viewer’s attention on specific elements within the scene.
- Consider adding dynamic elements, like moving clouds or animated trees, to enhance realism further.
It’s also important to remember that less is more when it comes to HDRI and 3D models. Don’t overwhelm the scene with too many elements. Instead, focus on the essential features that define the environment and mood you’re trying to create.
Step-by-Step Guide to Building an Atmospheric Scene in DAZ Studio
Now that we’ve explored the theory behind HDRI and 3D models, let’s walk through the practical steps of creating a detailed, atmospheric scene in DAZ Studio.
1. Selecting the Right HDRI Map
The first step is to choose an HDRI map that matches the mood of your scene. You can find numerous HDRI maps for free or purchase more specialized ones. In DAZ Studio, you’ll apply the HDRI map through the “Render Settings” tab, under “Environment.” Here, you can adjust the map’s intensity, rotation, and overall lighting effect.
2. Placing the Key 3D Models
Once the lighting is set, start adding your primary 3D models. These should be the focal points of your scene. For example, if you’re building a cityscape, you might begin by placing large buildings or bridges. If it's a nature scene, focus on trees, rocks, or bodies of water.
3. Adjusting Shadows and Reflections
To create realism, you’ll need to fine-tune how light interacts with your 3D models. Go to the “Surfaces” tab in DAZ Studio, and here, you can tweak the material properties of each model to ensure they reflect light accurately. Adding soft shadows under objects or adjusting the reflectivity of metallic surfaces can greatly enhance the realism of the scene.
4. Adding Secondary Details and Small Objects
Now it’s time to populate your scene with smaller details. These could be anything from debris on the ground to birds flying in the sky. Such additions contribute to the narrative and make the environment feel lived-in and realistic. But again, moderation is key. Too many details can clutter the scene and divert attention from the main action.
Maximizing the Impact: Fine-tuning for Photorealism
Creating a compelling environment doesn’t stop at simply placing models and applying an HDRI map. To truly make your scene stand out, you’ll want to focus on the finer points of photorealism. This involves:
- Ensuring that all elements within the scene match the lighting direction and intensity.
- Experimenting with different camera angles and focal lengths to create dynamic compositions.
- Utilizing post-processing effects, like bloom or motion blur, to add final polish to your renders.
- Applying subtle color correction to unify the overall tone and feel of the scene.
When all these elements come together, the result is an atmospheric environment that not only looks realistic but also feels immersive. Your audience should feel like they could step into your world and experience the emotions and stories you’ve crafted within it.
Conclusion: Mastering HDRI and 3D Models for Dynamic Environments
HDRI maps and 3D models are essential tools in the DAZ Studio artist’s toolkit. When used thoughtfully and with attention to detail, they can transform a simple scene into a breathtaking visual experience. By carefully selecting the right HDRI to set the mood and using 3D models to populate your environment, you can create stunningly realistic and atmospheric scenes that captivate and engage.
So go ahead—experiment with different combinations of HDRI maps and 3D models. Try out various lighting setups, play with camera angles, and most importantly, have fun bringing your creative vision to life in DAZ Studio!
Don't forget that on our website you can find a lot of content for rendering your scenes - there are lighting presets, HDRI maps, studios and more - all available for free download in this section.
Ctrl
Enter
Noticed a misTake
Highlight text and press Ctrl+EnterRelated news:

Creating and Adjusting Lighting for Atmospheric 3D Scenes in DAZ Studio and Poser

Creating Photorealistic Portraits in DAZ Studio and Poser
Analyzing Trends in Creating 3D Characters for Films and Video Games

Top Character Animation Tools in 2024

How to create environments for 3D scenes in DAZ Studio and Poser: general guidelines
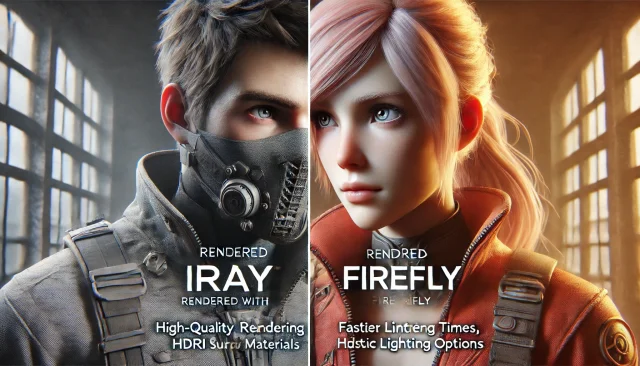
Using Iray and Firefly for Rendering in DAZ Studio and Poser
Comments (0)